
Choosing a plan at signup
Free finishes in the app; paid plans go through secure checkout.
User guide
Free finishes in the app; paid plans go through secure checkout.
Step 4 of signup shows the live plan catalogue for your country — the same plans, prices and inclusions you will later see on the Billing page.
Who can do this: the account owner, during signup. Everything here can be changed later from Billing — see Upgrading & downgrading.
Each card shows the plan's price in your country's currency, what the base price includes (stores and staff seats), and its capabilities. The Monthly / Annual toggle switches the billing cycle — annual costs ten months' price, so two months are free.
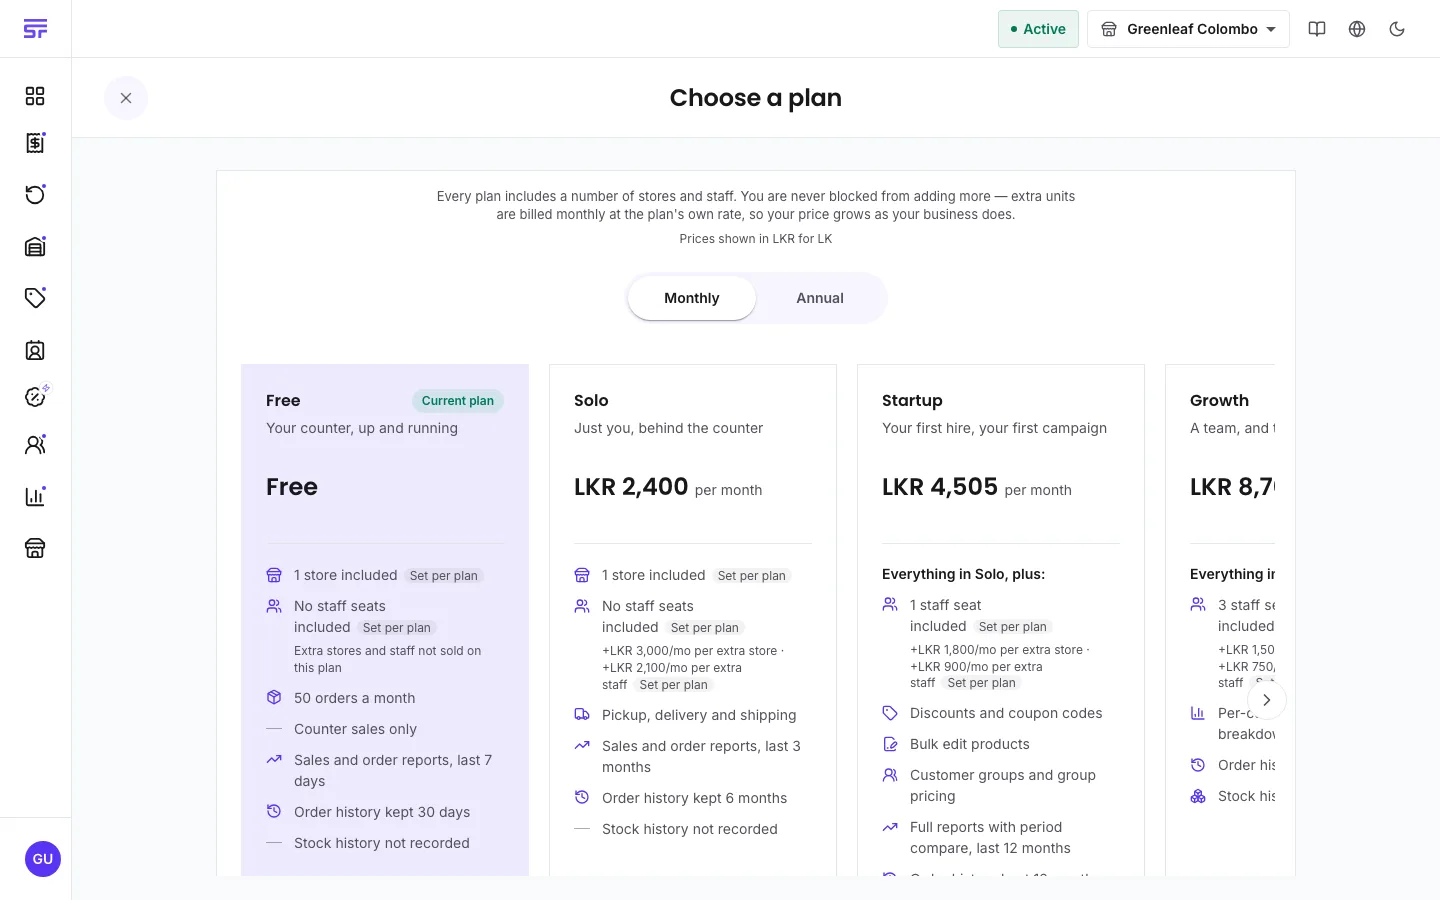
Under the paid cards sits Continue with Free Tier. Confirming it completes signup on the spot — no card, no checkout. The Free plan includes one store and a monthly order allowance (shown on the card and, later, on your dashboard's billing panel).
Choosing a paid plan sends you to a secure Stripe checkout page to save your card, then returns you to SellerTower with the subscription active.
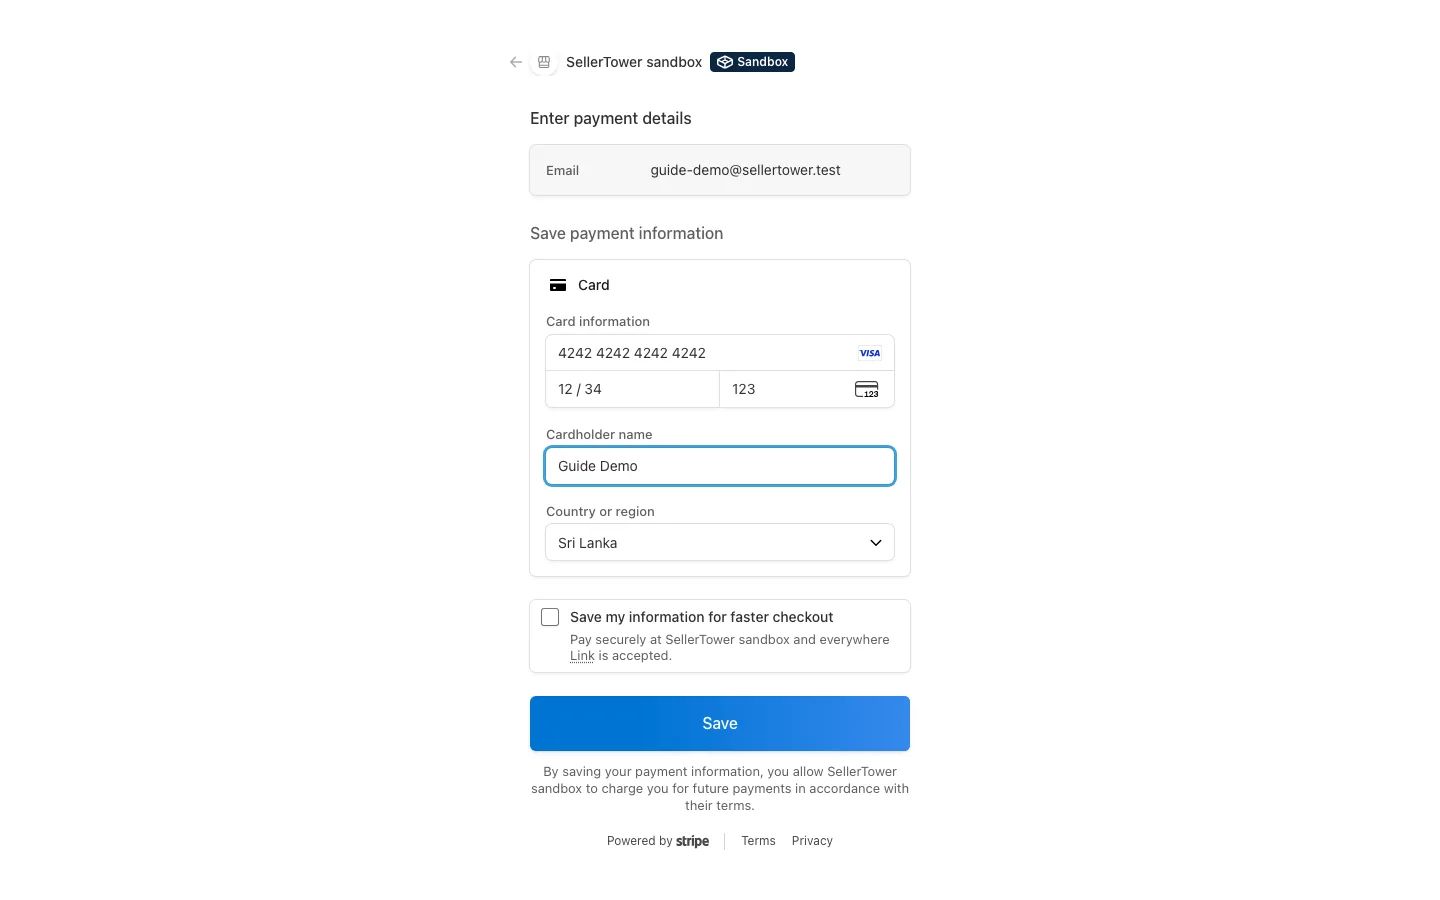
If your bank asks for extra confirmation (3-D Secure), signup stays on hold until the payment confirms — follow the link the screen offers, then return.
Backing out of the checkout returns you to the plan step; nothing is charged and you can pick again, or take Free and upgrade later.
How plans work · Seats & add-ons · Cancelling & moving to Free